Stanley Arts Tile Conservation Project
Project Overview
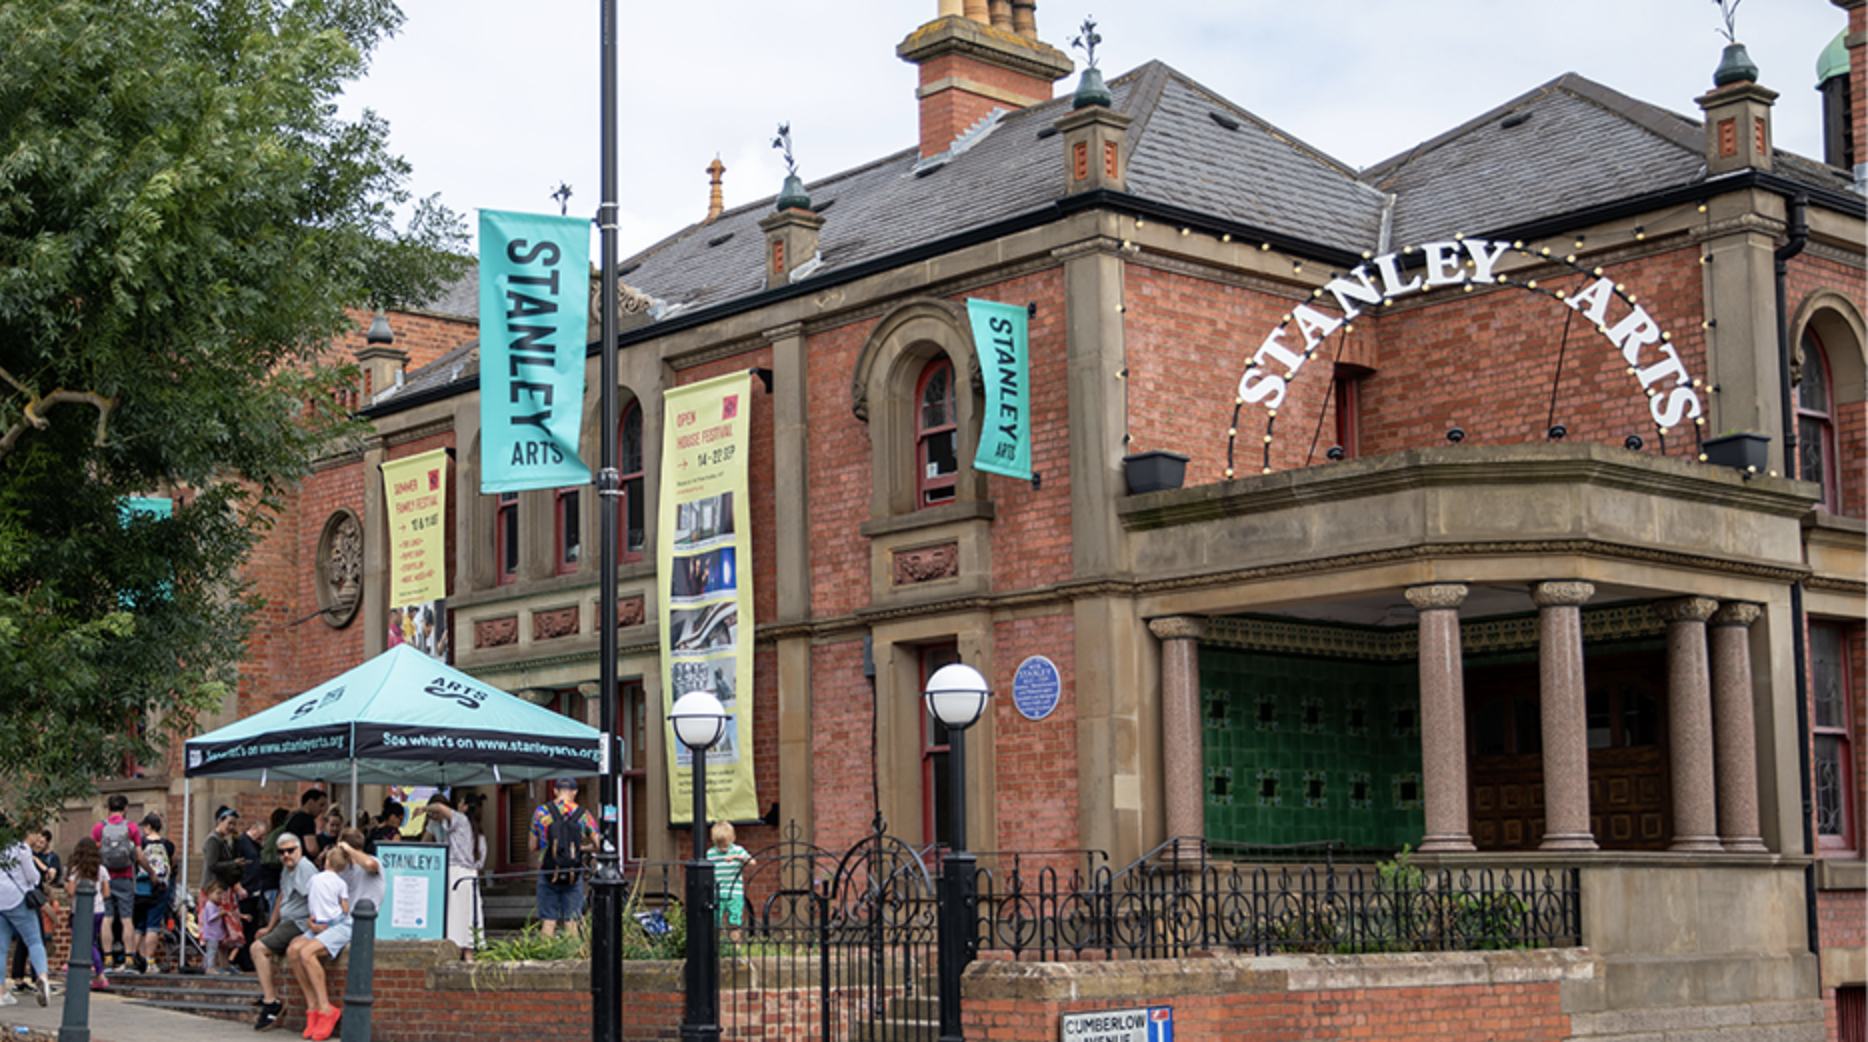
As part of a decade-long restoration initiative funded by the National Lottery, this seven-week conservation project focused on the intricately tiled interiors of Stanley Arts, an Edwardian-era community arts center in South London. The work took place within the Society Room and Assembly Room—spaces added in 1909 as part of the building’s final construction phase. These rooms house some of the finest surviving examples of Edwardian decorative tilework in South Norwood.
The conservation team addressed more than 930 square feet of glazed ceramic tiles, combining meticulous treatments with public programming to preserve this architectural heritage and foster community engagement.
The project was headed by Rose Hodges ACR and Tiago Oliveira ACR, who designed the treatment framework. My colleague Duncan McCall and I were invited to participate in refining the treatment plan, and all four of us collaborated on the carrying out the treatment over 7-weeks.

fig. 2

fig. 5

fig. 8

fig. 3

fig. 6

fig. 9
These photos above showcase some close-ups of the types of damage that was extensive throughout the two rooms we treated. Damage included abrasion, material encrustations, salt efflorescence(fig. 6), loose and missing tiles, areas of loss stemming from impact damage and mechanical alterations(fig. 3 & 9), paint (fig. 2 & 9 ), tobacco smoke residue, and mortar staining. The naturally pearlescent glaze was dull and uniformly coated in 100+ years of grime(fig. 10) which resisted the typical building maintenance style cleaning done throughout the buildings use.


Figure 11- Cleaning required intensive focus, and a kit of various tools and solvents. Here I am working with IMS dampened swabs to remove oily surface dirt on the upper trim tiles.

Figure 12- Using a pallet of tinted Primal WS24 I was able to layer colors onto plaster fills before adding a clear layer of Hxtal epoxy as a glaze imitation.
Figure 13- Example of a wall section before treatment.

Figure 15- One of the 4 fireplaces after treatment, custom ceramic grate tile installed


Figure 1- Me and my colleague Duncan working on in-situ tile cleaning.

fig. 4

fig. 7

fig. 10
Stanley Arts and William F. Stanley
The building which now houses Stanley Arts was commissioned by inventor, manufacturer, and philanthropist William F. Stanley (1829–1909). Stanley was a local businessman who made it big in the later 1800’s through designing and selling mathematical and drawing instruments. By the early 1900s, his South Norwood-based firm had grown into the largest of its kind globally.
After creating a name for himself, Stanley decided he wanted to improve his community and provide it with not just a community oriented social hall, but a place of learning as well. In 1901, Stanley funded the creation of Stanley Halls to be a social meeting place and to host a number of technical engineering classes. The buildings were constructed in stages between 1903 and 1909, with the Society and Assembly Rooms—the focus of this project—completed in the year of his death.
The buildings that make up Stanley Hall have since served the community of Norwood as a meeting place, host to local clubs and organizations, and as a Technical College. In 2007 the Stanley Tech school was rebranded as Harris Academy and a whole new, modern, building was built. The community of Norwood and Croydon made a collective decision to reallocate the historic building complex as a community arts center. In 2021 Stanley Arts was launched, and the dedicated team there has been busy creating people-centered programming, finding artisan and non-profit tenants, and securing funding for the restoration of this beautiful historic building complex.
The Tiles
The tilework in the Society and Assembly Rooms showcases iconic Edwardian palettes of olive greens, pearlescent turquoise, deep pooling reds, and rich browns as well as timeless craftsmanship. The details around fireplaces and along dado rails display the high quality of the original production, and show off the masterful glaze making of the early 1900’s British potteries. As part of the project, we collaborated with a historic tile manufacturer, Craven Dunnill Jackfield, to reproduce missing tiles.
Treatment Methodology
Cleaning-
Cleaning was carried out using a tiered approach:
Dry brushing and vacuuming loose dust
Surface cleaning with swabs and conservation-grade detergents
Application of acetone or commercial paint strippers where needed
Use of steam cleaning for stubborn residues
Mortar and cement were removed with precision tools such as scalpels and a Dremel
Demonstrations during the public talk included showing swab techniques and introducing the steam cleaning unit.
Filling and Consolidation-
Cracks and fragile breaks were stabilized using a 10% Paraloid B-72 solution in acetone.
Losses were addressed using a range of conservation-grade fill systems:
Small to Medium Losses: Chips and voids smaller than a single tile were filled with Crystacal R alpha plaster. Once dried, these fills were tinted with Primal WS24 and sealed with Paraloid B-72 to ensure durability and visual coherence.
Large Losses: Areas exceeding one tile in size were addressed using custom-made, historically accurate tiles produced by Craven Dunnill Jackfield. These replacements were installed with traditional lime mortar, tinted to match the surrounding original mortar, maintaining the aesthetic integrity of the space.
Minor Chips: A two-part epoxy system was employed, applying colored and clear layers to replicate the depth and sheen of the original glaze.
Demonstrations during the talk included real-time pigment mixing for color matching
Retouching-
To emulate the distinctive pooling and variation characteristic of the original glazes, retouching involved applying translucent, pigmented gelled epoxy over plaster core fills that had been primed with layers of tinted Primal W24 water based acrylic medium. In places where epoxy was used alone, fills were meticulously color-matched using a custom-mixed epoxy palette, allowing for nuanced replication of the unique surface qualities for each chip.
Ethics and Documentation
Every treatment was documented, including photographic records and material data, in accordance with ICON’s guidelines. The use of reversible and distinguishable materials ensures that future conservators can maintain or retreat the surfaces without obscuring the original work.
Fun side note…
While working on this project with my teammates we often stopped by a couple local lunch spots and cafes. One of omy favorite part of the project was having conversations with people in the community who would hear my American accent, ask what I was doing in the area, and leap to the opportunity to tell me about a class or an event they had attended at Stanley Arts when they found out I was working there. It was such a joy, to hear the love everyone had for the building and for the organization.

Figure 14– Same section after treatment. (click on all these photos for a larger image)

Figure 17- On the left are photos of a section after cleaning but before fills(left), and after fills (right)


Figure 16- After treatment wall section pictured before treatment in fig. 4 (reposted below for ease of comparison)


Above is a series of photos my mentor Tiago Oliveira took of me while I was working on retouching plaster fills.